Getting rid of an old refrigerator, washing machine, or oven sounds straightforward until you realize there is more to it than just dragging the appliance to the curb. Proper appliance removal preparation in Cincinnati, OH is a step that most homeowners skip, and that oversight can cause delays, safety hazards, and even property damage. Whether you are clearing space for a kitchen remodel or simply replacing an aging unit, knowing what to do before the removal crew arrives makes the whole process go much more smoothly. If you want help from trained professionals, appliance and furniture removal services in Cincinnati handle the heavy lifting so you do not have to.
This guide covers every step you need to take ahead of pickup day, from shutting off utility connections to cleaning out the interior of your appliance, so nothing catches you or the removal team off guard.
Why Preparation Matters Before Appliance Removal
Skipping the preparation phase is one of the most common mistakes homeowners make. An appliance that still has water in the lines or food residue inside can create problems ranging from minor inconveniences to genuine safety risks during transport.
According to the U.S. Consumer Product Safety Commission, improper handling of large appliances is a leading cause of home injury during moves and renovations. Taking a few proactive steps before pickup protects both you and the crew that comes to haul the unit away.
Beyond safety, preparation also keeps the process efficient. Removal teams can move quickly when appliances are already disconnected, emptied, and accessible. Delays caused by frozen water lines or a refrigerator still full of groceries slow everything down and can add to costs if you are working within a scheduled time window.
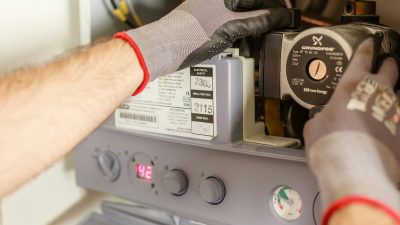
Step 1: Disconnect Utilities Well in Advance
The first and most important task is cutting off the utilities that power or supply your appliance. Doing this at least 24 to 48 hours before pickup gives the unit time to cool down, drain, or depressurize safely.
For refrigerators and freezers:
- Turn off the unit and unplug it from the wall outlet.
- Shut off the water supply valve if your refrigerator has an ice maker or water dispenser. The valve is typically located behind the unit or under the kitchen sink.
- Allow the ice maker and any internal water lines to drain completely.
For washing machines:
- Turn off both the hot and cold water supply valves connected to the machine.
- Run a short spin cycle to remove as much water as possible from the drum.
- Disconnect the water inlet hoses and let any remaining water drain into a bucket.
For gas appliances (dryers, ranges, ovens):
- Shut off the gas supply valve behind the appliance before disconnecting.
- If you are not comfortable disconnecting a gas line yourself, contact a licensed plumber or appliance technician. The American Gas Association recommends professional disconnection for all gas-line work to avoid leaks.
For electric dryers and ranges:
- Unplug the unit from the 240-volt outlet.
- If the cord is hardwired, have a licensed electrician disconnect it before removal day.
Step 2: Empty and Clean the Appliance Interior
An appliance that is clean and empty is much easier and safer to handle. Removal teams are not responsible for removing food, clothing, or stored items left inside a unit.
Refrigerators and freezers:
- Remove all food items and transfer perishables to a cooler.
- Defrost the freezer compartment fully. Excess ice can add significant weight and may melt during transport, causing water damage.
- Wipe down the interior shelves and walls with a mild cleaning solution to prevent odors from developing during transit.
- Remove any loose shelves, drawers, or bins and set them aside. These can be donated, recycled separately, or disposed of with regular trash depending on the material.
Washing machines and dryers:
- Check the drum for any clothing, coins, or small items that may have been left behind.
- Clean the lint trap in your dryer thoroughly. Lint is flammable, and a clogged trap creates a hazard during transport.
- Wipe down the rubber door seal on front-loading washers to remove any mold or residue.
Ovens and ranges:
- Remove oven racks and store them separately or discard them.
- Clean out any grease or food buildup from the interior. While a deep clean is not required, removing large debris prevents contamination of the removal vehicle and reduces fire risk.
- Remove the burner grates and drip pans from stovetop units.
Step 3: Secure Moving Parts and Prepare for Transport
Large appliances have components that can shift, vibrate, or break during transport if they are not properly secured beforehand.
- Use appliance-specific shipping bolts for washing machines if you still have them. These bolts secure the drum during transport and prevent internal damage.
- Tape the doors of refrigerators shut with moving tape to keep them from swinging open. Avoid using tape that could damage the finish; painter’s tape works well.
- Wrap glass cooktop surfaces with moving blankets or bubble wrap to prevent cracking.
- Coil and secure any power cords or hoses with zip ties or tape so they do not drag on the floor during removal.
Step 4: Create a Clear Path for Removal
One of the most overlooked parts of appliance removal preparation is simply making sure the removal crew can do their job safely.
- Move furniture, rugs, and other items out of the path from the appliance to the exit.
- Measure doorways and hallways if you are unsure whether the appliance will fit through without turning or tilting.
- Protect hardwood floors or tile with cardboard or moving blankets to prevent scratches as the unit is slid out.
- If the appliance is in a tight space such as a closet or built-in nook, pull it out as far as possible beforehand to give the crew room to grip and maneuver it.
- Make sure there is adequate parking or access space outside your home so the removal vehicle can load efficiently.
Step 5: Know What Happens to Your Appliance After Removal
Understanding the disposal process can help you make decisions that align with environmental and legal requirements in your area.
Many older appliances contain refrigerants, oils, and other materials that require proper handling under EPA regulations. Certified removal services follow these guidelines and ensure appliances are recycled, refurbished, or disposed of in compliance with local and federal rules.
If your appliance is still in working condition, ask whether the removal service partners with donation organizations or secondhand retailers. Donating a functional unit keeps it out of landfills and benefits someone in need.
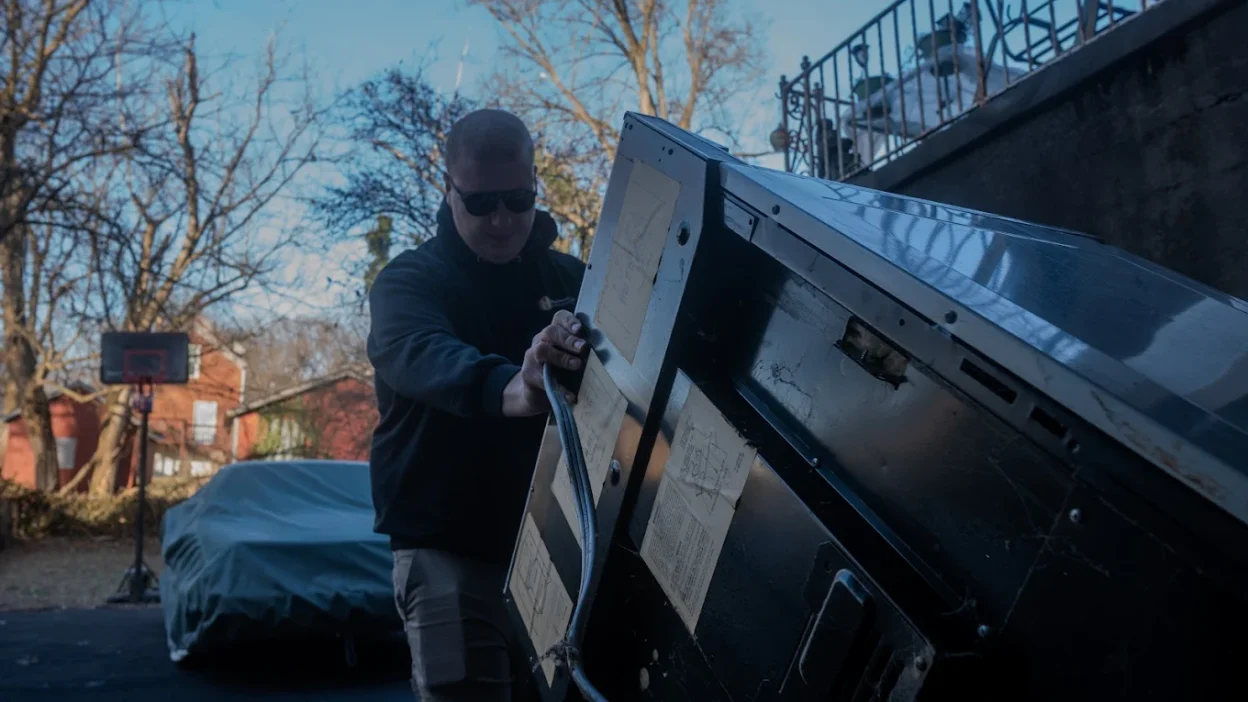
Why Professional Removal Services Are Worth It
Handling large appliances without proper equipment or training puts you at risk of back injuries, floor damage, and plumbing mishaps. Professional removal teams bring the tools, knowledge, and vehicles needed to get the job done without those risks.
Trained crews know how to navigate tight hallways, disconnect residual water or electrical connections, and load heavy units without damaging your home or themselves. They are also familiar with local disposal regulations, which means you do not have to worry about whether your old refrigerator ends up in a landfill improperly.
You can find reputable appliance removal professionals in Cincinnati who handle the entire process from start to finish, giving you peace of mind and saving you the physical effort of dealing with it alone.
Final Thoughts on Appliance Removal Preparation
Preparing an appliance for removal does not have to be complicated, but it does require a bit of planning. Shutting off utilities, emptying and cleaning the interior, securing moving parts, and clearing a path are the four pillars of a well-prepared pickup. When you take care of these steps ahead of time, the removal process becomes quick, safe, and stress-free.
Whether you are replacing a single appliance or clearing out an entire kitchen, taking an hour or two to prepare properly saves time, prevents damage, and protects everyone involved. And when you hand the job off to experienced professionals, you can trust that the rest of the process is handled the right way.
Frequently Asked Questions
About Appliance Removal Preparation
1. How far in advance should I disconnect my appliances before removal?
For most appliances, disconnecting 24 to 48 hours in advance is ideal. This gives refrigerators and freezers time to defrost, water lines time to drain, and gas connections time to depressurize safely. Rushing these steps can create safety hazards on pickup day.
2. Do I need to be home when the removal crew arrives?
In most cases, yes. Being present allows you to direct the crew, answer questions about utility shutoffs, and confirm which items are being removed. Some services may accommodate unattended pickups if you have made arrangements ahead of time, but it is generally best to be available.
3. Can I leave items inside the appliance for removal?
Most professional removal services require appliances to be completely empty before pickup. Leaving food, clothing, or personal items inside a unit can cause delays, damage, or extra fees. Always empty the interior before the crew arrives.
4. What should I do with the water lines after disconnecting my washing machine?
After removing the inlet hoses, cap the water supply valves to prevent any drips. Store the hoses if they are in good condition, as they can often be reused with a new machine. If the hoses are worn or cracked, they can typically be disposed of with household trash or at a hardware store recycling bin.
5. Is it safe to move a refrigerator on its side?
Refrigerators should remain upright whenever possible during transport. Laying one on its side can cause compressor oil to flow into the refrigerant lines, which may damage the unit and create disposal issues. If a refrigerator must be tilted briefly to fit through a doorway, it should be stood upright for at least a few hours before being powered on again. Professional removal crews understand how to handle this situation properly.